
- 필자는 Docker로 Nginx를 구성했다.
- 따라서, 이어지는 과정은 Docker를 기반으로 진행된다.
- (추가) 덧붙임에 Nginx를 직접 컴파일하는 경우에 대한 정보를 적어뒀다.
HTTPS 설정 (HTTP + TLS)
- 만약 Nginx 서버가 HTTP를 사용 중이라면, 먼저 HTTPS를 사용하게 변경해야 한다.
TLS 인증서 발급
- Let’s Encrypt를 활용하여 무료 TLS 인증서를 발급받는다.
1
2
3
4
$ docker run -it --rm --name certbot \
  -v '/etc/letsencrypt:/etc/letsencrypt' \
  -v '/var/lib/letsencrypt:/var/lib/letsencrypt' \
  certbot/certbot certonly -d 'yourdomain.com' --manual --preferred-challenges dns --server https://acme-v02.api.letsencrypt.org/directory
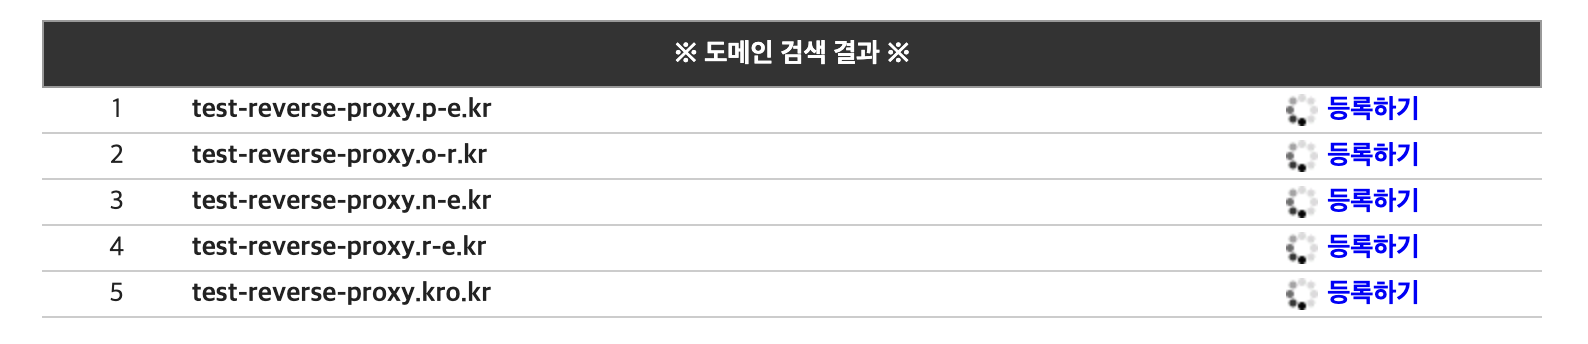
DNS 발급
- 내도메인.한국을 활용하여 무료 DNS를 발급받는다.
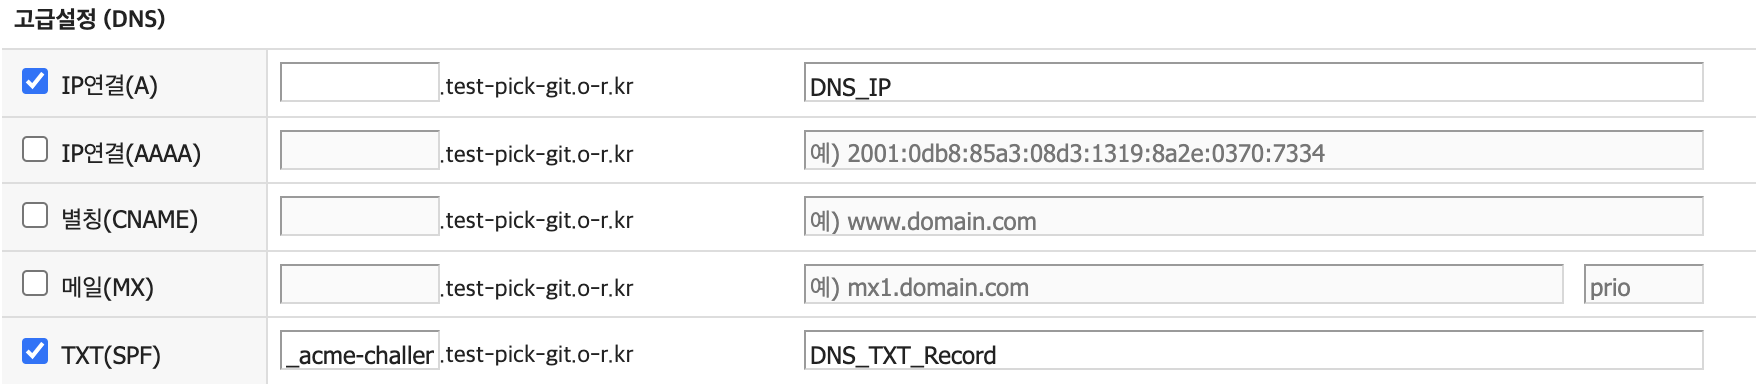
DNS 정보 추가
- DNS 정보에 서버의 Public IP(from EC2)와 DNS TXT Record(from Let’s Encrypt)를 추가한다.
TLS 인증서 추가
- Dockerfile 파일, nginx.conf 파일에 TLS 인증서를 추가한다.
1
2
3
4
5
6
// Dockerfile
FROM nginx

COPY nginx.conf /etc/nginx/nginx.conf
COPY fullchain.pem /etc/letsencrypt/live/{도메인_주소}/fullchain.pem
COPY privkey.pem /etc/letsencrypt/live/{도메인_주소}/privkey.pem
1
2
3
4
5
6
7
8
9
10
11
12
13
14
15
16
17
18
19
20
21
22
23
24
25
26
27
28
29
30
31
32
33
34
35
36
37
38
39
40
// nginx.conf
events {}

http {
  upstream app {
    server {WAS_IP:WAS_PORT};
  }

  # Redirect all traffic to HTTPS
  server {
    listen 80;
    return 301 https://$host$request_uri;
  }

  server {
    listen 443 ssl;
    ssl_certificate /etc/letsencrypt/live/{도메인_주소}/fullchain.pem;
    ssl_certificate_key /etc/letsencrypt/live/{도메인_주소}/privkey.pem;

    # Disable SSL
    ssl_protocols TLSv1 TLSv1.1 TLSv1.2;

    # 통신과정에서 사용할 암호화 알고리즘
    ssl_prefer_server_ciphers on;
    ssl_ciphers ECDH+AESGCM:ECDH+AES256:ECDH+AES128:DH+3DES:!ADH:!AECDH:!MD5;

    # Enable HSTS
    # client의 browser에게 http로 어떠한 것도 load 하지 말라고 규제합니다.
    # 이를 통해 http에서 https로 redirect 되는 request를 minimize 할 수 있습니다.
    add_header Strict-Transport-Security "max-age=31536000" always;

    # SSL sessions
    ssl_session_cache shared:SSL:10m;
    ssl_session_timeout 10m;

    location / {
      proxy_pass http://app;
    }
  }
}
HTTP 2.0 적용
- nginx.conf 파일에
http2를 추가한다.
1
2
3
4
5
6
7
8
9
10
11
12
13
14
15
16
17
18
19
20
21
22
23
24
25
26
27
28
29
30
31
32
33
34
35
36
37
38
39
40
41
// nginx.conf
events {}

http {
  upstream app {
    server {WAS_IP:WAS_PORT};
  }

  # Redirect all traffic to HTTPS
  server {
    listen 80;
    return 301 https://$host$request_uri;
  }

  server {
    // 이곳에 추가한다.
    listen 443 ssl http2;
    ssl_certificate /etc/letsencrypt/live/{도메인_주소}/fullchain.pem;
    ssl_certificate_key /etc/letsencrypt/live/{도메인_주소}/privkey.pem;

    # Disable SSL
    ssl_protocols TLSv1 TLSv1.1 TLSv1.2;

    # 통신과정에서 사용할 암호화 알고리즘
    ssl_prefer_server_ciphers on;
    ssl_ciphers ECDH+AESGCM:ECDH+AES256:ECDH+AES128:DH+3DES:!ADH:!AECDH:!MD5;

    # Enable HSTS
    # client의 browser에게 http로 어떠한 것도 load 하지 말라고 규제합니다.
    # 이를 통해 http에서 https로 redirect 되는 request를 minimize 할 수 있습니다.
    add_header Strict-Transport-Security "max-age=31536000" always;

    # SSL sessions
    ssl_session_cache shared:SSL:10m;
    ssl_session_timeout 10m;

    location / {
      proxy_pass http://app;
    }
  }
}
Docker Image 생성
- 지금까지의 수정 내용을 반영하는 Docker Image를 생성한다.
1
$ docker build -t {docker_image_repository_name} {path}
Docker 실행
- 해당 Docker Image를 이용하여 Docker Container를 실행한다.
1
$ docker run -d -p 80:80 -p 443:443 --name {docker_container_name} {docker_image_repository_name}
결과 비교
- API 응답 크기가 줄어들고, 속도가 빨라졌다.
- HTTP 1.1의 단점을 개선한 게 HTTP 2.0인데, 이와 관련한 내용은 다음에 정리하자.
HTTP 1.1

HTTP 2.0

덧붙임
Nginx를 직접 컴파일하는 경우
- Nginx는 일부 모듈을 default로 제공한다.
- 하지만, http2에서 사용하는 모듈(–with-http_v2_module)은 default로 제공되지 않고, 따로 설정해야 한다.
1
2
3
4
5
6
7
8
9
10
11
// configure 파일이 있는 위치로 이동한다.
[REVERSE_PROXY][07:12:15][ubuntu@ip-xxx-xxx-x-xxx ~/nginx_with_health_check/nginx-1.14.2]
$ ls
... conf  configure  contrib  ...

// configure를 실행하여 http2 모듈을 설정한다.
$ ./configure --prefix=/usr/local/nginx --with-http_v2_module --with-{이_외_다른_모듈} ...

// nginx를 컴파일하고, 설치한다.
$ make
$ make install
1
2
3
4
5
6
// nginx.conf 위치
$ pwd
/usr/local/nginx/conf/nginx.conf

// nginx 재시작
$ sudo /usr/local/nginx/sbin/nginx -s reload
결과 비교
- 이때에도 API 응답 크기와 속도가 개선된 것을 확인할 수 있다.
HTTP 1.1

HTTP 2.0
